How do you hold a massage tool?
If you want to do massage more than 5 years then you need to hold a massage tool in a way that’s not going to hurt your hand.
Start by setting your table low.
Why low?
So that you can lean your body weight into the massage table, pinning the tool between your hand and the tissue you’re working on.
Once the tool is pinned you can relax your hand.
I’m going to help you understand what this looks like in a second, but first I want to introduce you to one of my favorite massage tools: The t-bar.
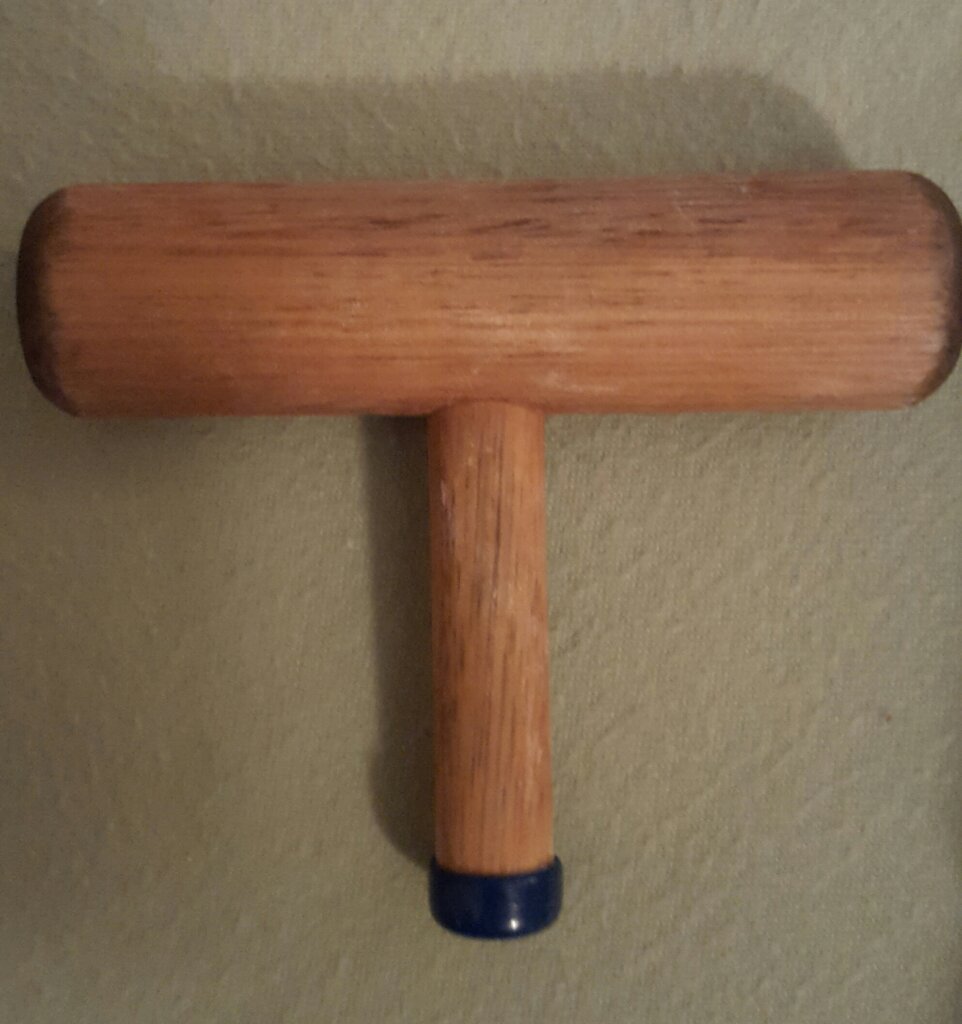
My neuromuscular massage instructors told me that the t-bar would save my thumbs when doing precise work.
They were right. It did save my thumbs.
But, unfortunately, it made my fingers cry.
Crying fingers meant I used the t-bar sparingly, and I never got confident with it.
It’s Not the Massage Tool
For a long time I thought the massage tool was the problem.
But it turns out that this wasn’t true. I was the problem–specifically, how I held the massage tool.
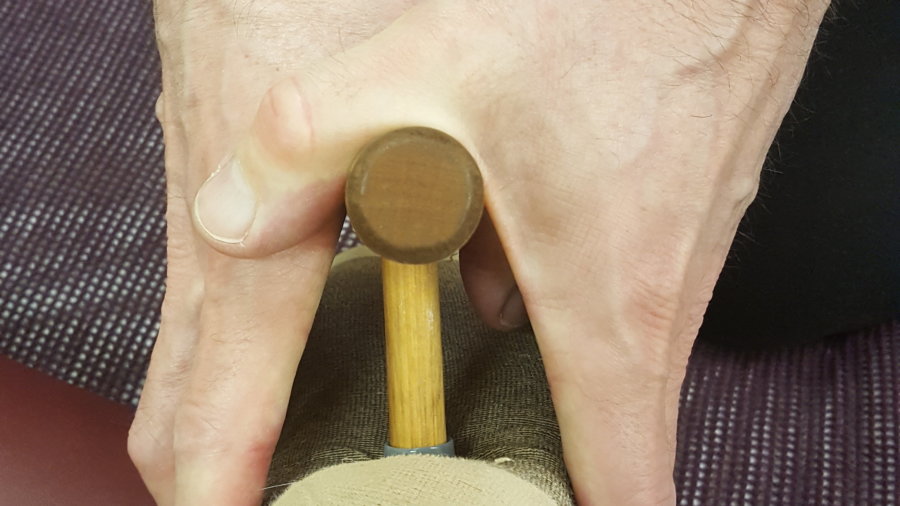
Here’s how we were taught to hold the t-bar in neuromuscular massage training.
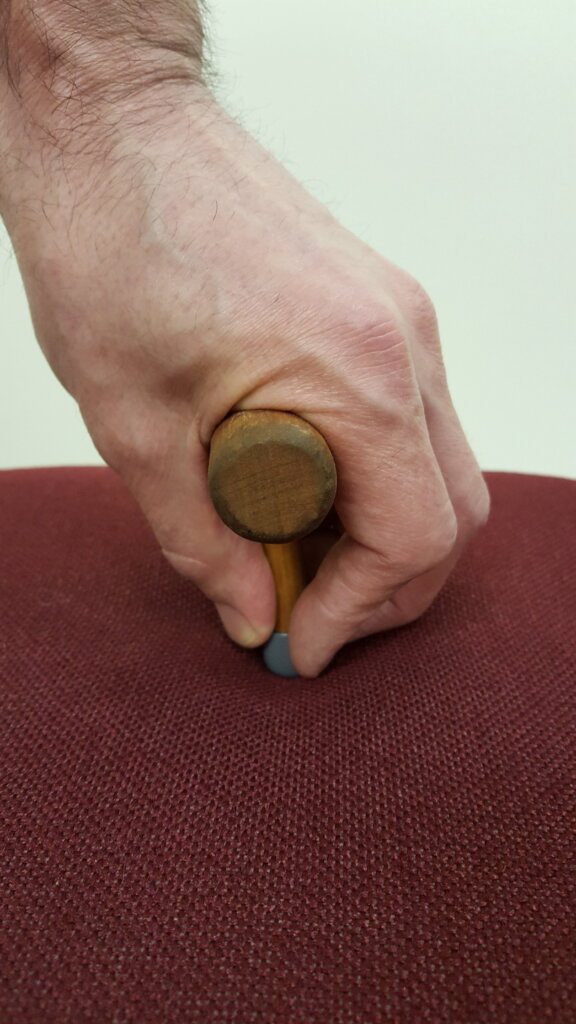
You can see that my fingers are doing a lot of work at the end of the tool and, subsequently, they were in a lot of pain after doing a massage.
Hmm…was there a way to hold the t-bar that wouldn’t stress my fingers?
1. Lean
My options increased once I lowered my table. When I lowered my table I could lean and use my whole body to generate pressure.
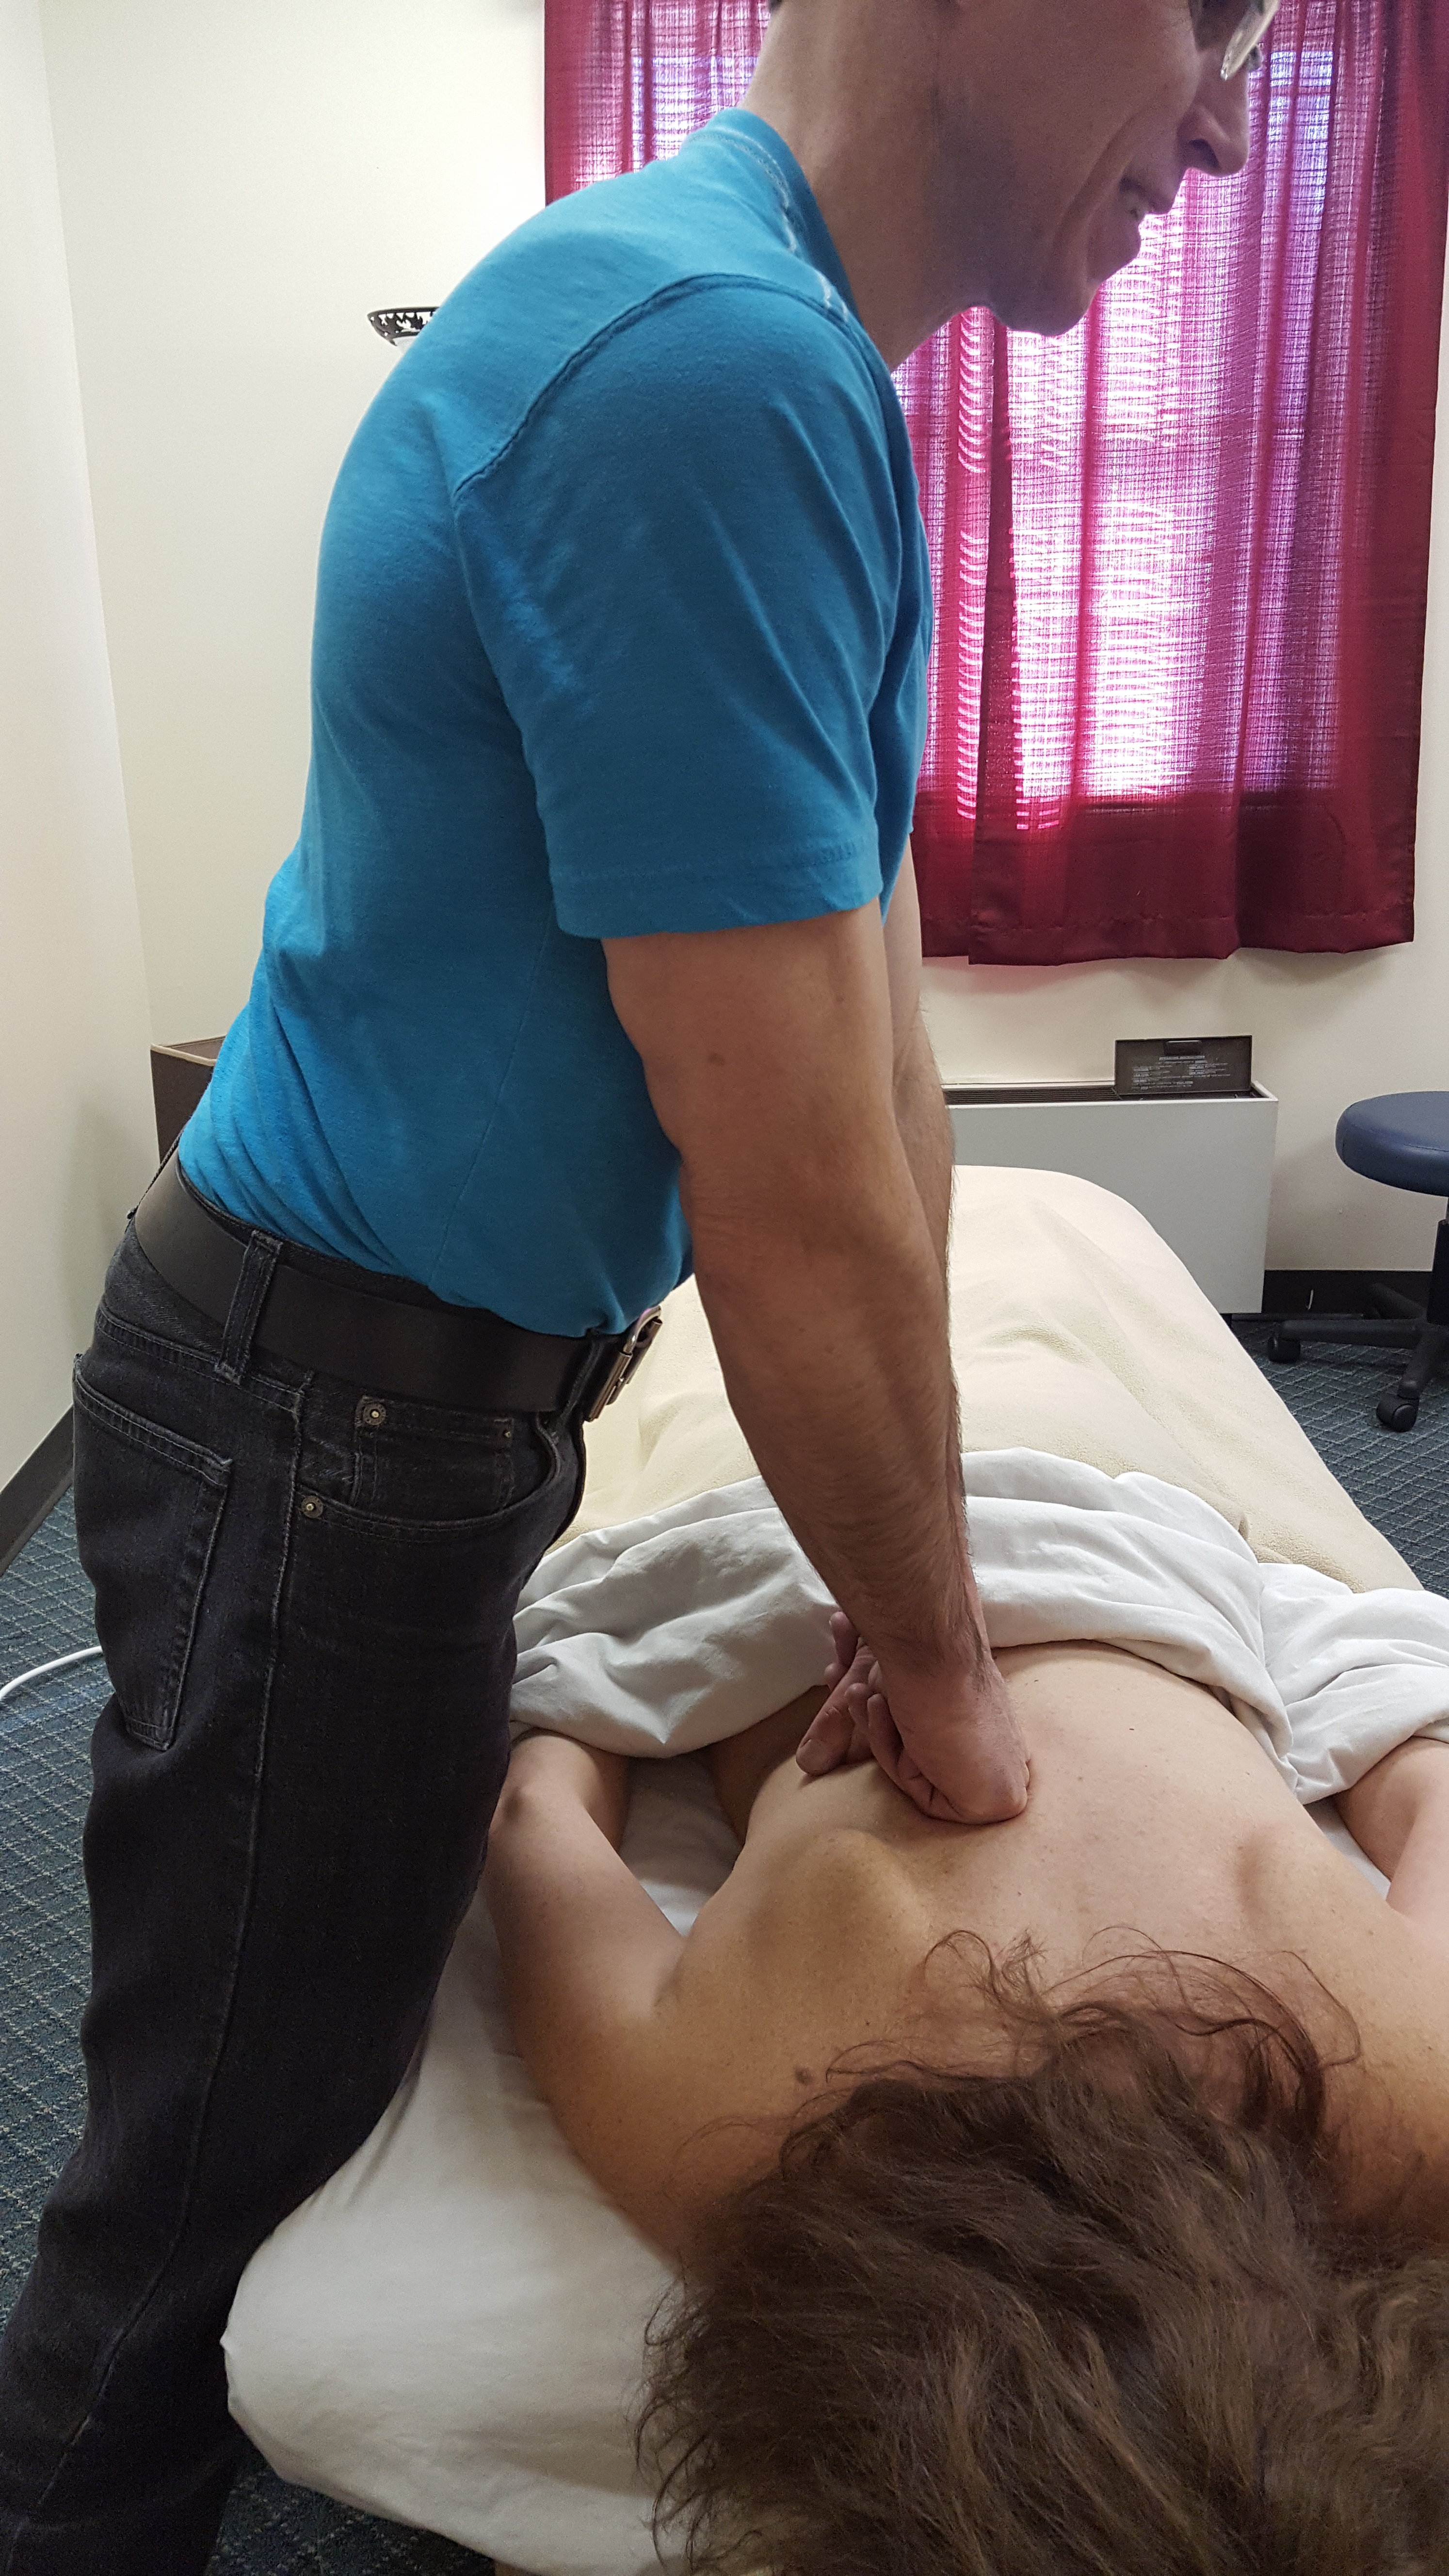
When I did that it was easy to…
2. Pin the massage tool.
I’d pin the massage tool between my hand and the muscle I was working on.
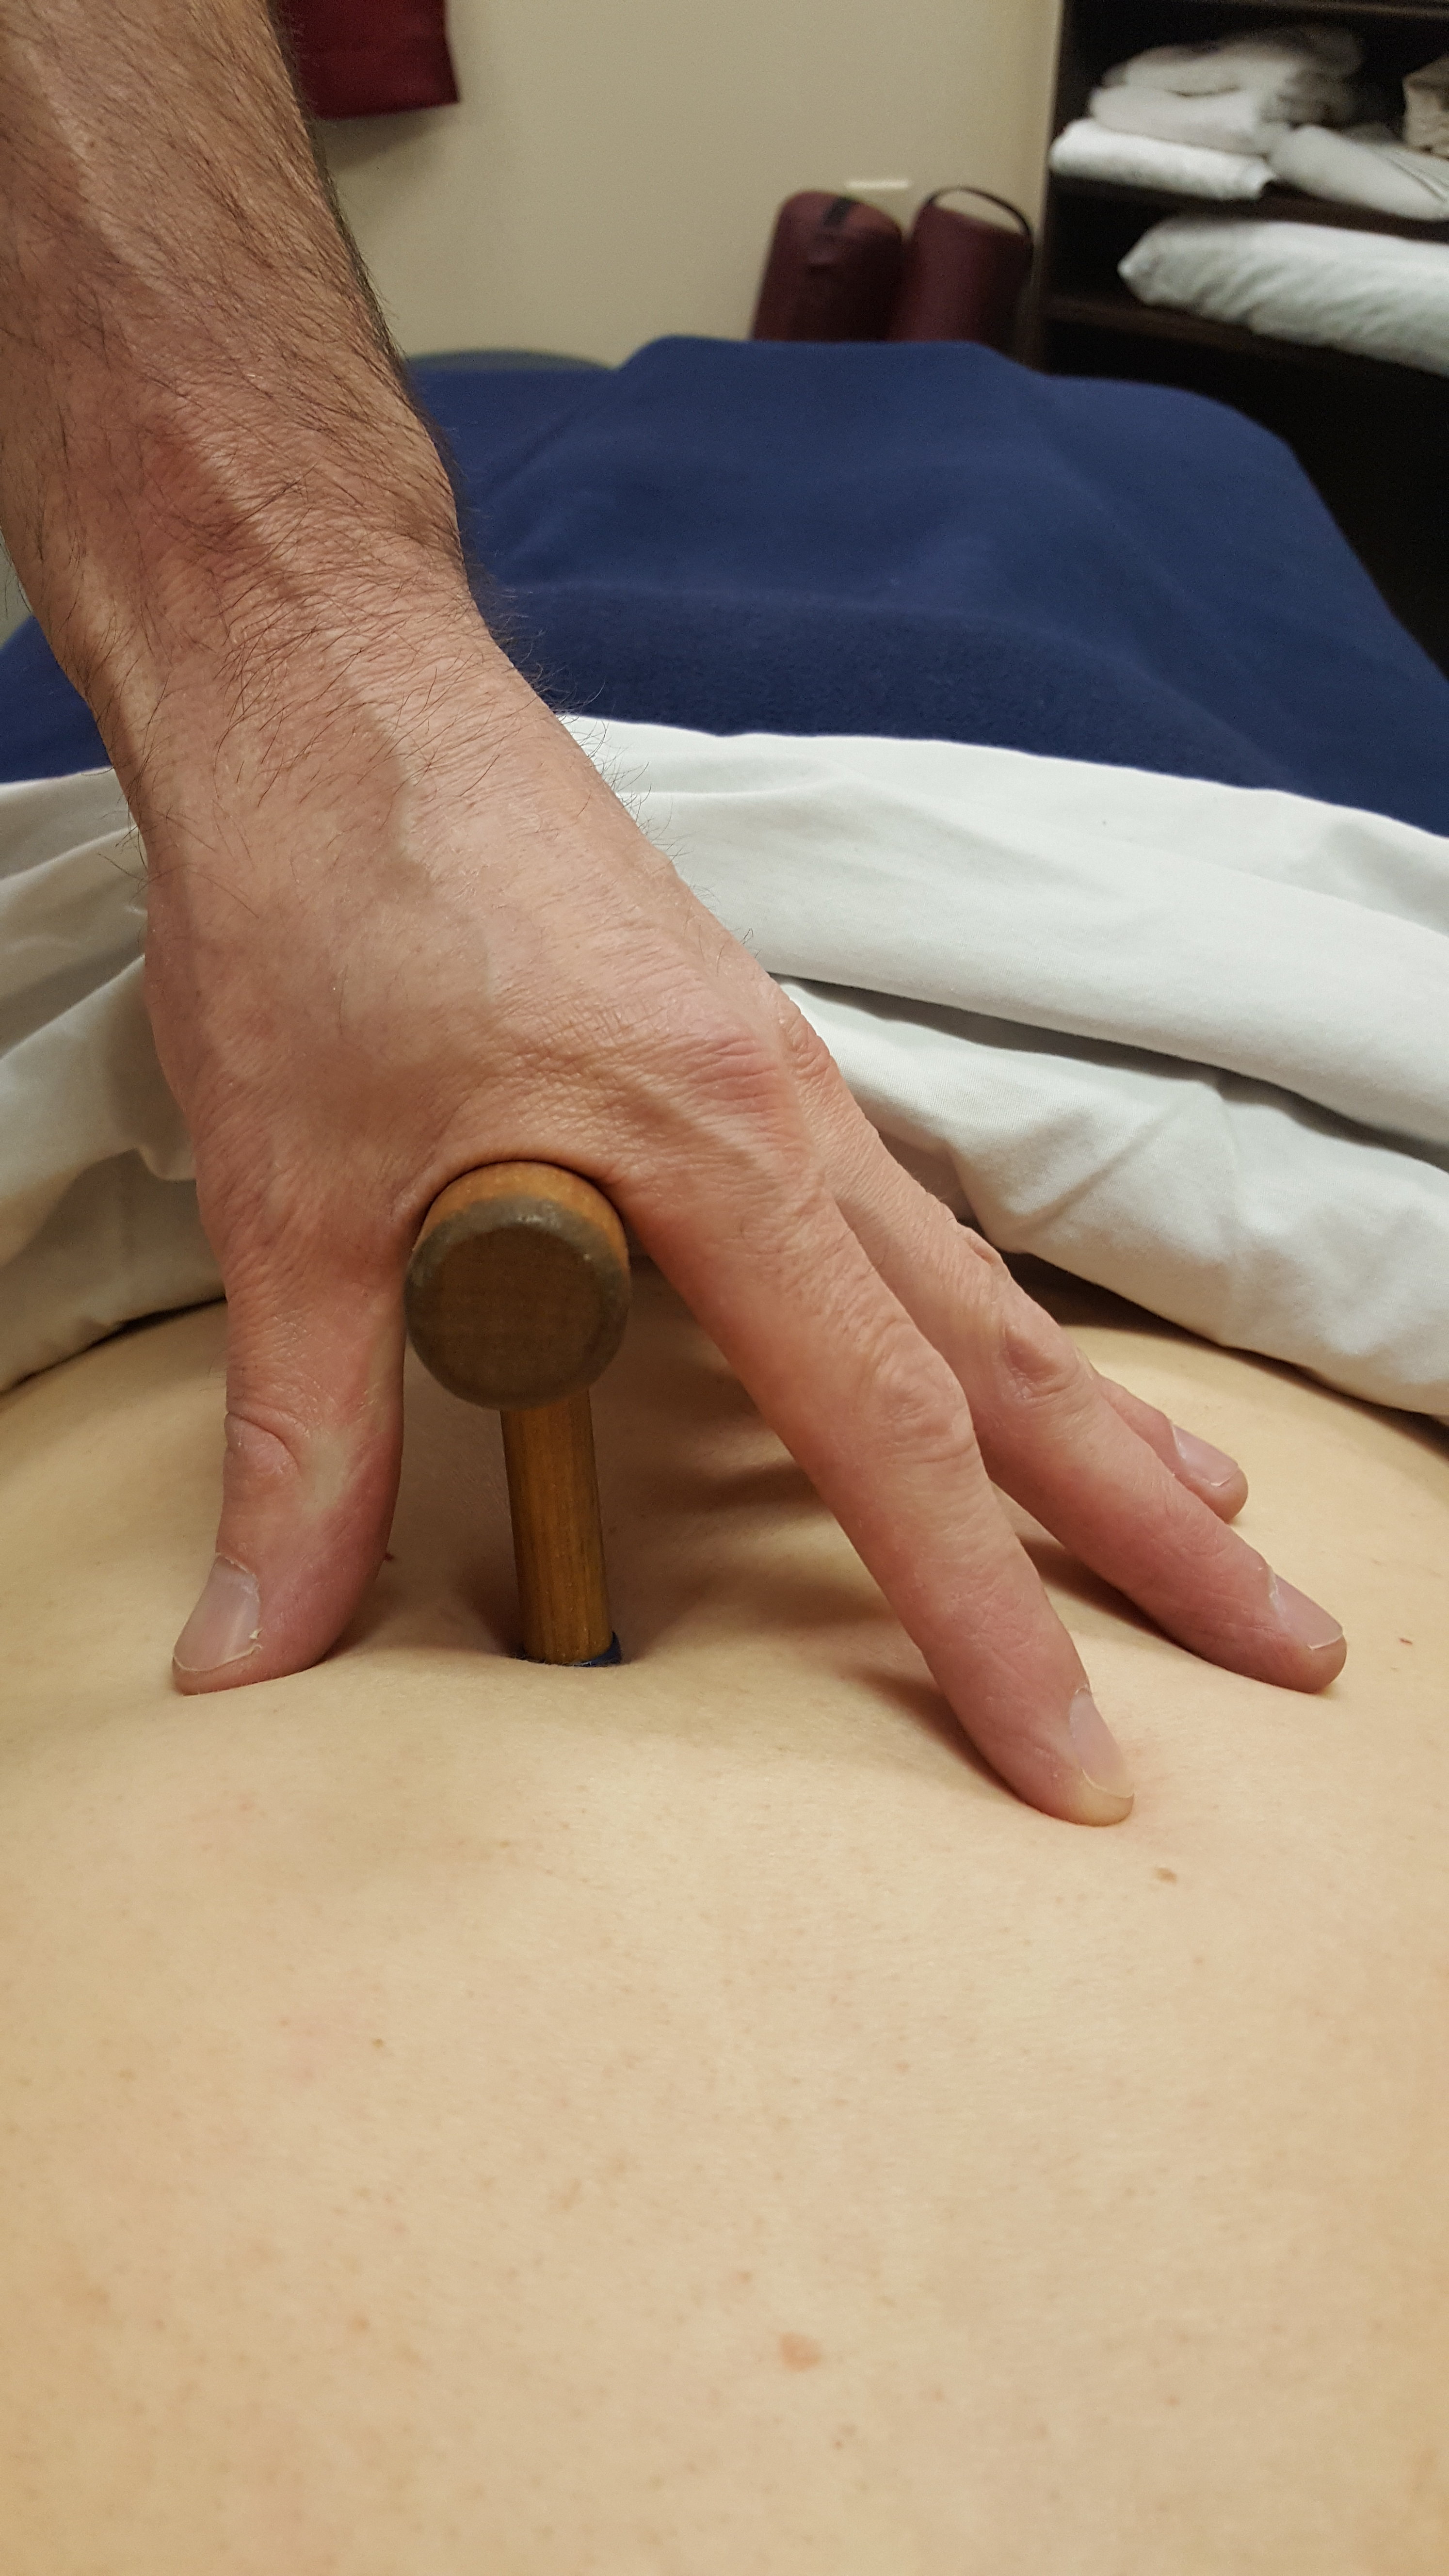
Once the massage tool was pinned, I could …
3. Relax the hand holding the massage tool.
Here’s my go-to hold now:
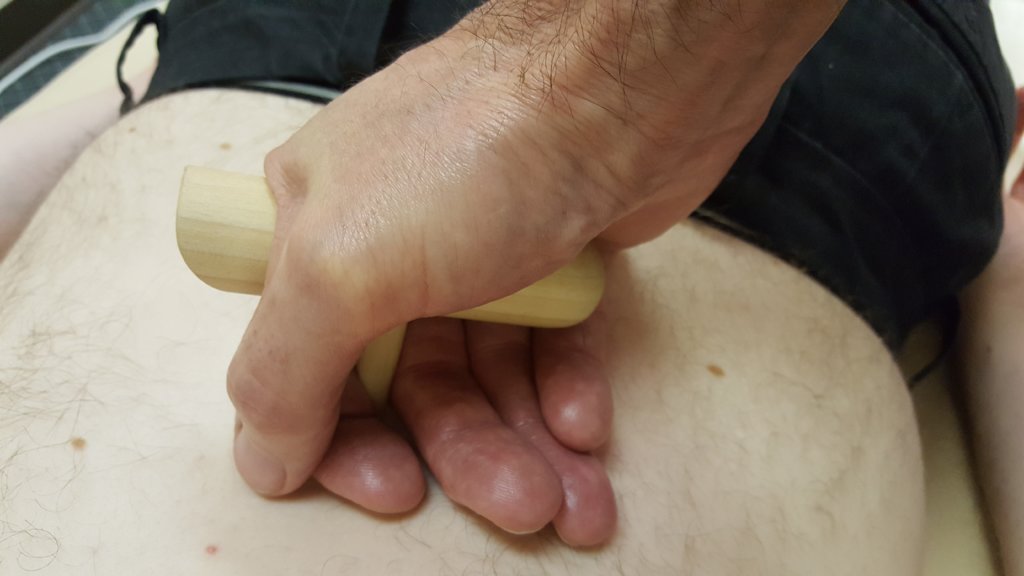
My hand looks pretty relaxed, right?
It is…but what happens if I needed to crank up the pressure?
Exactly, I’d wrap my hand around the massage tool and grip hard so that the tool wouldn’t fall out of my hand.
Fortunately, there’s an answer for over-gripping when doing deep pressure.
It is to use a guide finger/hand or a second hand.
4. Guide Finger/2nd Hand
A guide finger by the massage tool helped me stabilize the tool in my hand so that I didn’t have to tighten my hold when applying more pressure.
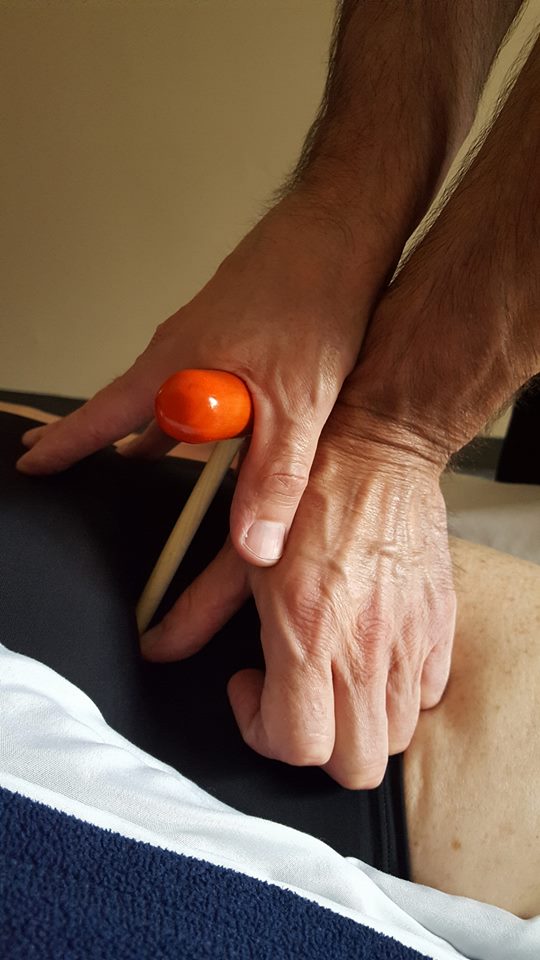
In this picture I’m not directing a lot of the pressure (my body weight) into the guide finger because I’m basically using the guide finger to stabilize the tool.
A guide finger also helped me with delivering pressure.
Applying Pressure with a Massage Tool
Say you want to use your T-bar to press into a trigger point with medium pressure.
This is where a lot of MTs usually abandon ship and I get it.
You’re taking a hunk of wood or plastic and trying to press with a certain amount of pressure.
How the hell is that going to go well?
Well, the trusty guide finger will help you out.
First, with your guide finger palpate where you want to apply specific pressure.
In the picture below my thumb next to the tip of the massage tool is my guide finger.
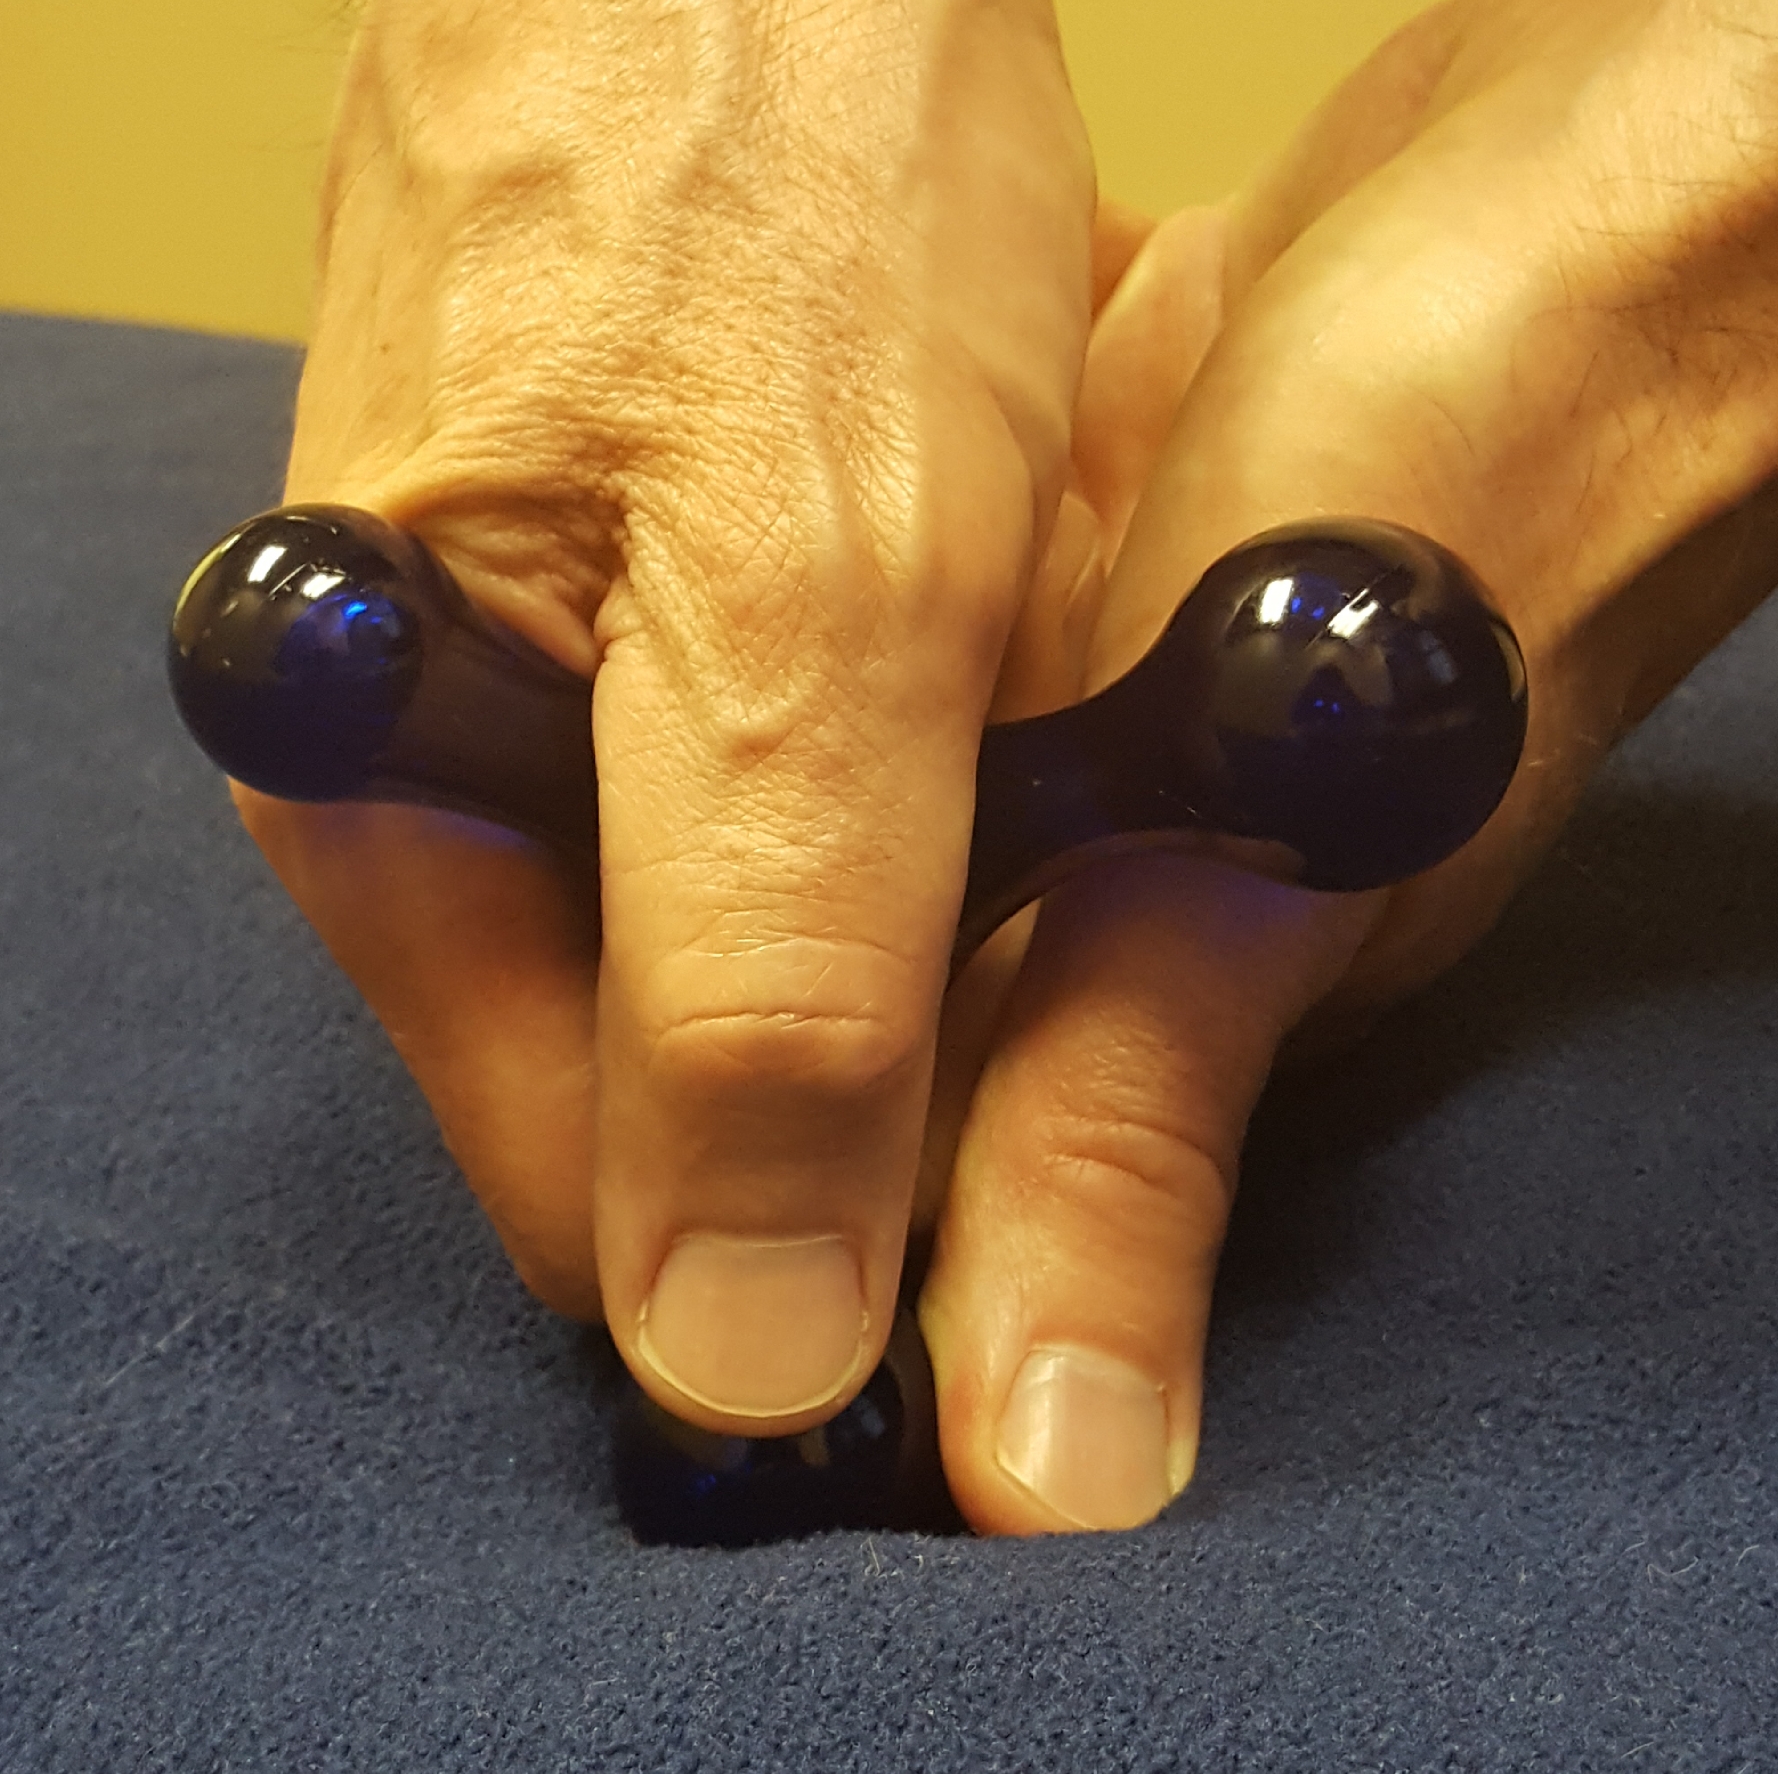
Once you find the area press with your guide finger at the specific pressure you desire.
Next slip in the massage tool tip where your guide finger was and mimic that pressure.
It’s really not hard to do.
And once you start getting some reps in you’ll be able to start “sensing” pressure through the massage tool.
So, the guide finger helps stabilize the massage tool, find trigger points/tight spots and is the mechanism for determining pressure with a massage tool.
It will also save you from making someone scream Ouch!
How Not to Make Someone Scream when Using a Massage Tool
Let’s just say it, massage tools look intimidating.
One time a client looked up from the massage table and saw all my massage tools spread out on my stool.
She said, It looks like I’m about to get a dental treatment.
Come on, I said, I’m not licensed to administer Novocaine.
The fact that massage tools can look threatening doesn’t mean they need to cause pain.
And you can pretty much eliminate times when you press too hard or press into something you shouldn’t, like a bone or a lipoma, by doing this one thing: Do an exploratory massage stroke without the massage tool.
Without your massage tool do a glide stroke and note the areas where you may want to apply more or less pressure.
I’m going to call those notable areas speed bumps because you should be slowing your stroke down as you approach them.
Once you have a road map of your speed bumps you can glide with your massage tool.
As you approach a speed bump lighten your pressure with the massage tool. And once you’re on the speed bump you can then determine how much pressure you want to apply with your massage tool in a safe and slow way.
This is what an example looks like:
Speed Bump Map for the Back
Destiny wants her back worked.
So, before you pick up your massage tool you do some exploratory massage strokes to get a feel for her back.
Here are the speed bumps you find: Right side between scaps tight; T8 spinous process not aligned; L2 areas tightness; L5 lypoma.
Here’s what your massage tool stroke might look like:
You start your stroke above the scapula and before you get to your first speed bump between the scapula and the spine, you slightly lighten your pressure with your massage tool.
Once you understand the tightness and location of the speed bump with you massage tool, you start to apply the pressure you think is appropriate with the massage tool.
You settle for medium pressure and you ask Destiny how that feels.
She says, Perfect.
You then glide to the next speed bump, the misaligned T8 spinous process. You lighten your pressure before you hit the speed bump.
The area next to the misaligned T8 doesn’t feel tight and the client is reactive to your pressure. You decide that your massage tool is not needed here.
You continue on to speed bump number 3, tightness around L2.
You lighten your pressure, get on the speed bump and then hear Destiny sigh. You lean into your massage tool a little more to exert more pressure and you sense that Destiny is relaxing even more.
This speed bump likes the focused and deeper pressure.
You spend a little more time there and then continue on to the last speed bump, what you think is a lipoma around L5.
As you approach this speed bump you opt to use your guide finger to palpate this area.
Yep, you’re fairly certain it’s a lipoma.
No tool work needed here.
No screams.
No pressing on things you shouldn’t be pressing on.
Boom.
It was a clean and effective massage-tool, glide stroke and your client loved it.
So I’d diverged a little here because I thought it was important to show you that a massage tool is not a lethal weapon and, in fact, could be a very effective relaxation tool.
Now I need to tell you one more thing about holding a massage tool: Vary your holds to help avoid overuse injuries.
Vary Your Holds
Here are some variations on my go-to hold. This is a fist-as-a-guide-hand hold.
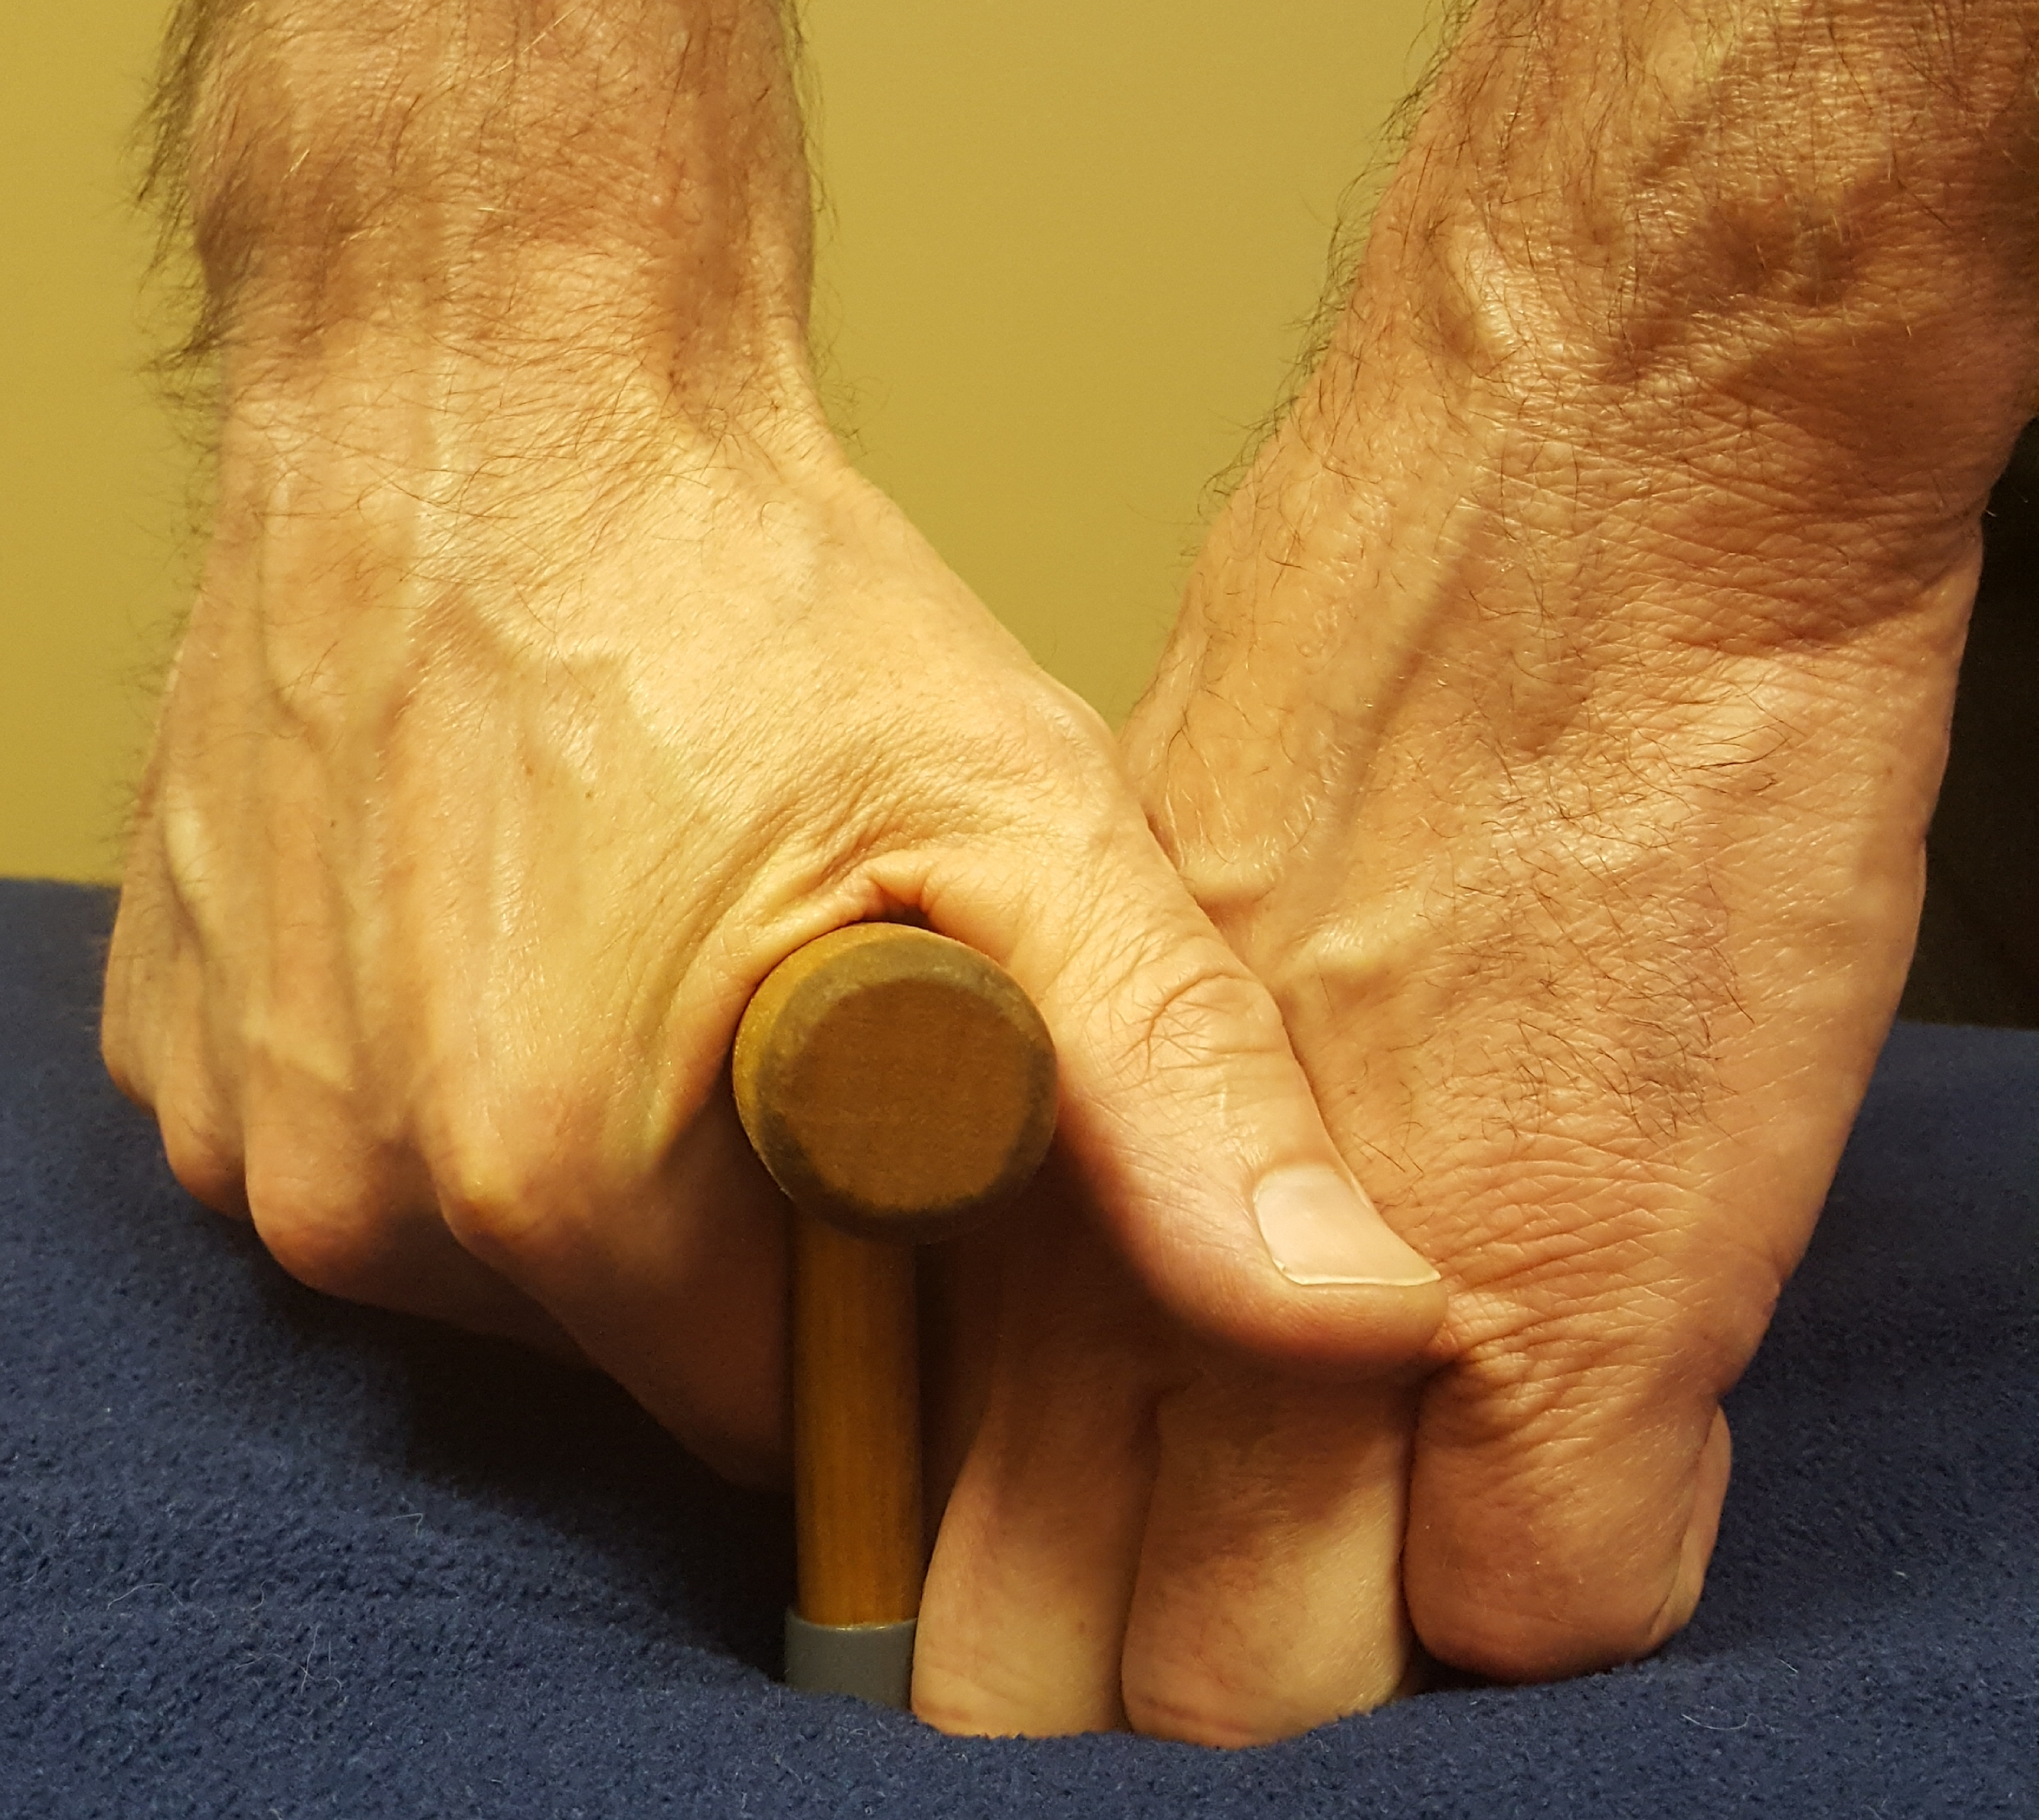
This is a two-handed hold (both hands on the handle).
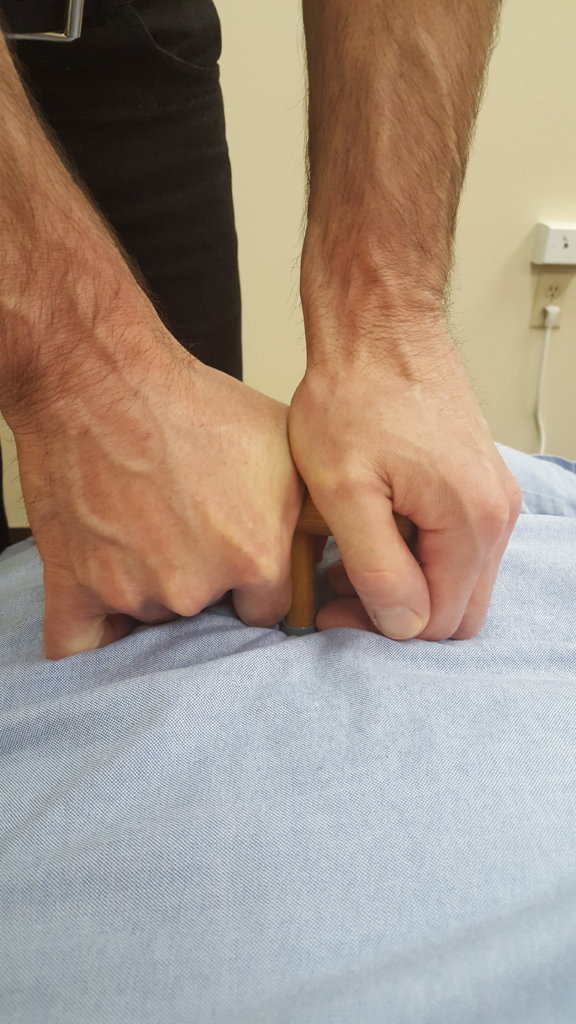
This is a two-handed hold on a TheraPress.
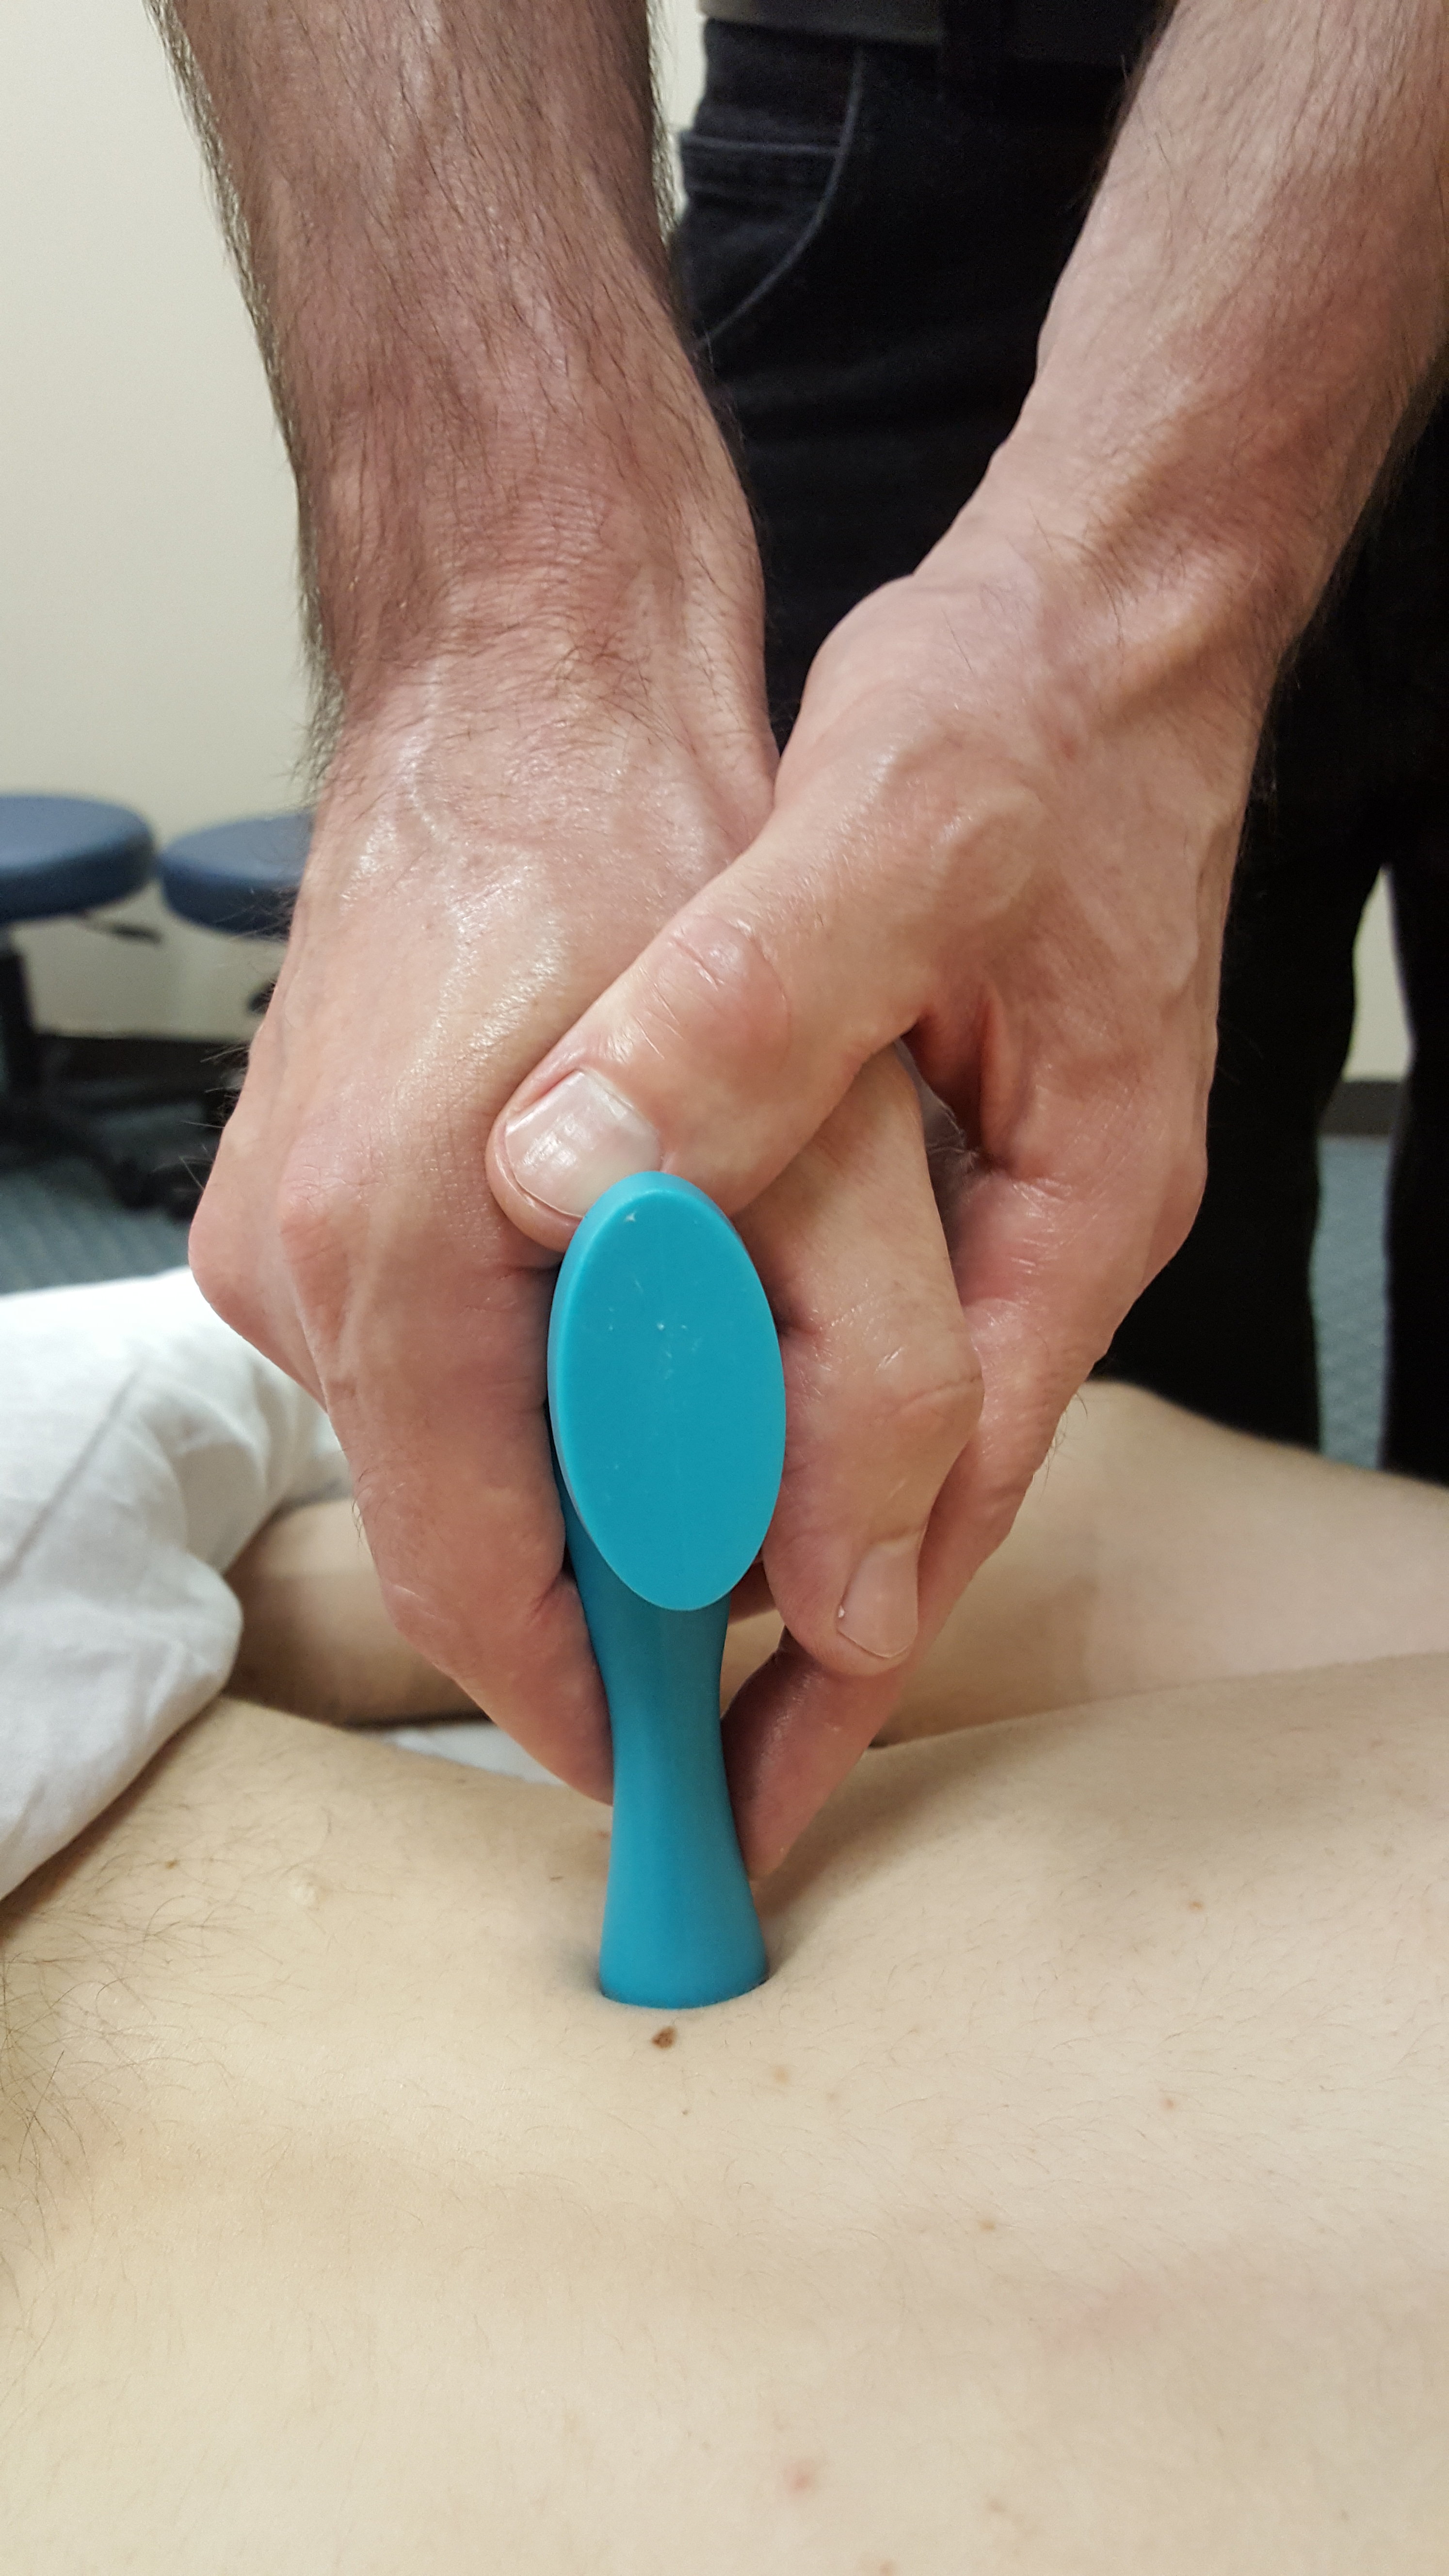
Once you have 3 or 4 holds down pat your massage world will change.
Your hands won’t burn out. You’ll be able to increase your massage max. And you won’t fear deep work.
Let’s do a quick recap.
How Do You Hold A Massage Tool Recap
So, how do you hold a massage tool so that it doesn’t hurt your hand?
1. Lean.
2. Pin the massage tool.
3. Relax the hand holding the massage tool.
4. Add a guide finger or use two hands to stabilize the massage tool.
You can sense pressure and palpate with the guide finger.
Sprinkle in different holds and voila your hands are going to love you.
In this video I demonstrate how I use two hands to hold a massage tool:
[embedyt] https://www.youtube.com/watch?v=V9rNmUwU_J0[/embedyt]
 Want to know more about how I use massage tools for focus work, relaxation massage and deep pressure massage?
Check out my online, home study class: How to Use a Massage Tool.
